Thursday, January 31, 2013

Applesauce

When my 6-month old first started solids, the first fruit I tried feeding him was applesauce. After a few days, he was displaying some symptoms of sensitivity to this first fruit and it was suggested to me that it might be too acidic for his tender age. While I was pregnant, I had found a recipe for applesauce that calls for a few strips of lemon zest. While alone, lemons tend to be acidic, they are also thought to be alkalizing or neutralizing when we consume them. So in testing this theory, I am making my own applesauce for my son to try in hopes he won't be as sensitive to the acidity in apples. I will post those results in a few days. Even still, for anybody, this applesauce is deliciously sweet and the hint of cinnamon is perfect. Adding any more would be too much. Keep it nice and chunky right out of the pot or purée in small batches in the blender to make it nice and smooth. Refrigerate and use within a couple of days or freeze for up to several months.


Taste in Bloom Original Photo

Difficulty: Easy; Serves: 8; Prep time: 10 mins + 30 mins cook time (+5 mins if using blender)

Slightly adapted from Smitten Kitchen
Ingredients

  • 4 lbs apples, peeled, cored and sliced (I used Empire; Rome and Cortland work well too)
  • 1 1/2 strips of lemon zest, peeled from the lemon with a vegetable peeler or paring knife
  • 1/4 tsp ground cinnamon or 1 cinnamon stick
  • 1 cup water

Preparation:

Combine all ingredients in a large pot. Bring to a boil. Cover and reduce heat to a simmer. Simmer for 30 minutes or until apples are tender or easily pierced with a fork. When tender, mash apples a bit with the back of a fork. Remove lemon zest and cinnamon stick if you used it. Allow to cool a bit.

If you like your applesauce really smooth, purée in a blender in small batches for a few seconds each.

Edit: My son still showed sensitivity even to homemade applesauce, though it was a little less severe. I used this same recipe but changed the apples for D'anjou pears and simmered for about 45 minutes until they were very tender. He loves it!

Wednesday, January 30, 2013

Mirepoix

Being from Louisiana and having grown up in "Cajun Country," I've learned a thing or two about Cajun cooking. One of the most important things I've learned, aside from how to make a good roux, is the mirepoix, also known as the holy trinity of cooking. The trinity consists of diced onion, carrot and celery or celeriac. It makes up the base of most Cajun cuisine. I use it in my stocks, soups and stews. It's a basic recipe worth learning for any new cook. Though it may not be called mirepoix in most recipes, many stocks, soups, stews and sauces call for these ingredients together as a base. It wouldn't hurt to keep a supply of this on hand. If you do so, store it in your refrigerator for up to a few days, but check on it before using it. You'll want the freshest ingredients you can find if you make it ahead of time.

Taste in Bloom Original Photo


Difficulty: Easy; Prep time: 5 minutes

Taste in Bloom Original
Ingredients:
  • 2 medium carrots
  • 2 medium celery stalks 
  • 1 medium yellow onion

Preparation:

Dice all ingredients. Use in your next soup, sauce or stew recipe that calls for them.

Weeknight Chili

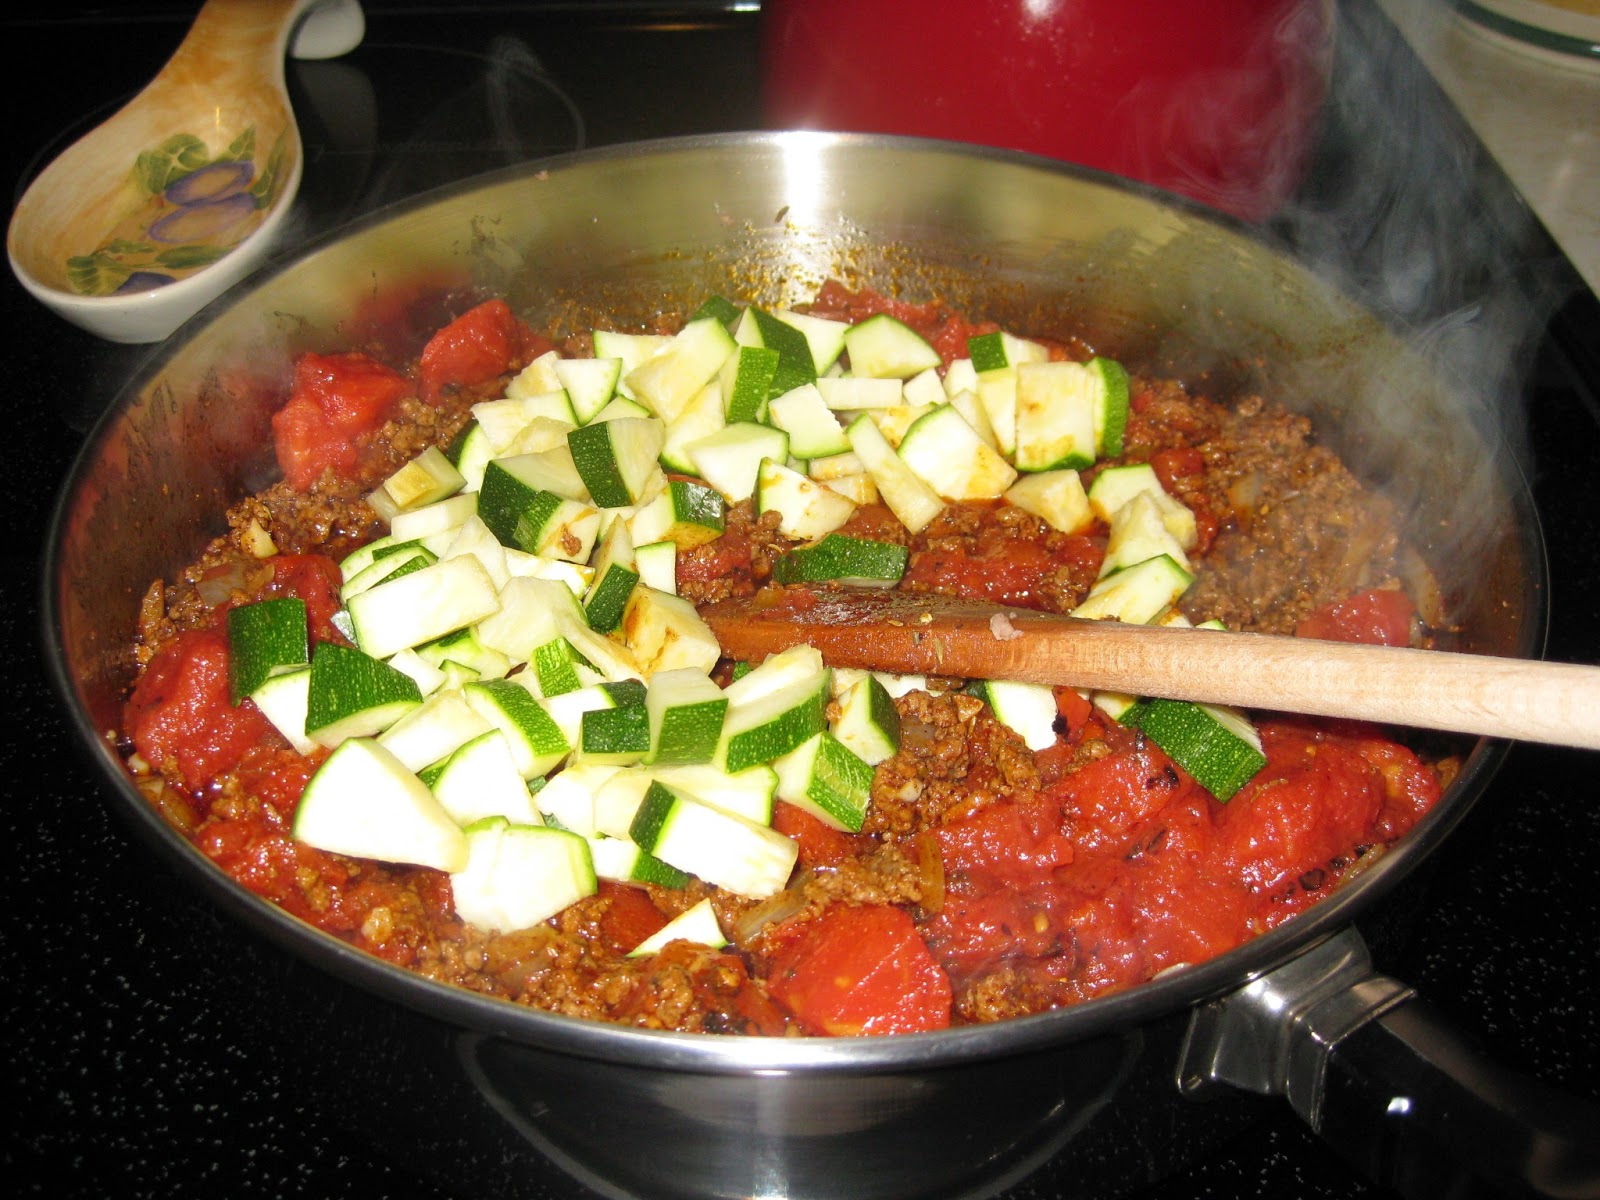
Some days, you just need a hot meal that is easy, quick and can be made in one pot. Well, here you go: a one-pot, weeknight chili. Just like many of the recipes I post here, this concoction is also versatile. You can use shallots instead of onion and garlic; yellow, orange or green bell pepper or yellow squash instead of zucchini; or ground turkey instead of ground beef. While I don't usually add beans to this chili, you can add black beans and red kidney beans for a heartier version. When you serve, melt your favorite cheese on top and scoop it with chips. This chili is also great for chili dogs.

Taste in Bloom Original Photo

Difficulty: Easy; Serves: 4; Prep time: 10 minutes + 20 (up to 45) minutes cook time

Taste in Bloom Original
Ingredients:
  • 1 Tbsp olive oil
  • 1 1/2 lbs ground beef
  • 1 medium onion, diced
  • 4 cloves garlic, minced.
  • 1 medium bell pepper or zucchini
  • 3 Tbsp chili powder
  • 1 1/2 tsp ground cumin
  • 2 tsp dried oregano
  • salt & pepper to taste
  • 1- 14.5oz can of diced tomatoes (try fire roasted)
  • beef stock (opt. to taste if your chili is thicker than you like)
  • 1-2 cans of beans of your choice, drained (opt.)

Preparation:

Heat olive oil in a large pot over medium heat. 

Combine ground beef, diced onion and minced garlic together in the large pot and cook until the beef is browned.

Add the seasonings: chili powder, cumin, oregano, salt and pepper and stir until combined. Stir in diced tomatoes and bell pepper or zucchini and beans, if using. Reduce heat to a simmer.

If at this point the chili is a little thicker than you like, stir in beef stock, one tablespoon at a time, until the chili reaches the desired consistency. Simmer for 20 minutes or up to 45 minutes, covered just so a little steam can escape.

Tuesday, January 29, 2013

Tuna Salad

There are lots of ways to prepare tuna salad. You can mix it with mayonnaise, salt and pepper. You can add celery to the mix and even some chopped up hard boiled eggs. My favorite way to make tuna salad is to throw in some celery, onion powder and dried fruit. It is very satisfying for lunch, snack or any old time of day. I eat the tuna salad right out of the bowl. Sometimes I like to scoop it onto half an avocado. It's also delicious on half a cored apple. And if you like, it's great on your favorite sandwich bread.

Taste in Bloom Original Photo

Difficulty: Easy; Serves: 2; Prep time: 10 minutes

Adapted from *Primal Blueprint Quick & Easy Meals
Ingredients:

  • 2 - 6oz cans tuna packed in water
  • 2 stalks of celery, diced
  • 1 tsp onion powder or 1/4 cup red onion, diced
  • 1/4 cup mayonnaise, or more to taste
  • 1/2 cup dried cranberries or dried cherries

Preparation:

Mix all ingredients together in medium bowl. Serve as you'd like.

Sunday, January 27, 2013

Cast Iron Cooking

I am from south Louisiana where food, family and tradition tend to be tightly intertwined. If you have a family gathering, food is almost always involved. This has gone on, and continues to go on, for generations. The best kind of traditions are the tried and true ones that are passed down. One of those is the use of cast iron cookware. I only have one piece right now: an enameled cast iron skillet. I use it for everything that can be made in a frying pan and then some. It can go from stove-top to oven with ease. With proper care, it can last for generations. Here is my skillet:

Taste in Bloom Original Photo


Drop Biscuits

Every weekend morning, it is tradition in our home to have biscuits with breakfast. This roots back to my weekend visits with my grandparents as a kid. We would have fresh homemade biscuits with a wide assortment of toppings at our disposal. My grandmother's recipe basically amounted to a "few scoops of this" and "a few sprinkles of that." No two batches of her biscuits were exactly alike, but they were always amazing.

When learning to make my own, I felt more comfortable following a recipe. I found one that works for me and have stuck with it, more or less, ever since. I always make sure to have ingredients on hand for these biscuits. Because if there is ever a day during the week that we are snowed in or home for some other reason, these are going right into the oven.

Taste in Bloom Original Photo
Difficulty: Easy; Serves: 12; Prep time: 5 minutes + 10 minutes baking time

Slightly adapted from *Better Homes and Gardens Cookbook 14th Edition
Ingredients (1 dozen):

  • 3 cups all-purpose flour
  • 1 Tbsp baking powder
  • 1 Tbsp sugar
  • 1/2 tsp salt
  • 3/4 tsp cream of tartar
  • 3/4 cup butter, softened
  • 1 1/4 cup milk or 1 1/2 cups buttermilk (less if humidity is high) 

Preparation:

Preheat oven to 450 degrees. Line a cookie sheet with parchment paper.

In a large bowl, combine all dry ingredients: flour, baking powder, sugar, salt and cream of tartar. Using either a pastry blender or butter knife, cut in softened butter into the dry mixture until it resembles coarse crumbs. Some butter lumps are okay.

Make a well in the center of the crumby mixture. Pour all of the milk into the well. Stir just until the mixture is moistened. Using a tablespoon, drop dough in heaping spoonfuls onto parchment paper lined cookie sheet. Bake for 10 minutes.

Friday, January 25, 2013

No Grain Granola

I mentioned in an earlier post that I once tried the Paleo Diet with success and that I would be filling this site with recipes that I used and continue to use. This is another one of those recipes. This is my cereal. I have not been diagnosed lactose intolerant, but I do feel sick after drinking milk. So I enjoy this granola with unsweetened almond milk. It is divine. And a very small serving is incredibly filling. And if you store the granola in an airtight container, it will keep for months. Even better.

The "flakes" are slivered almonds that have been combined with melted coconut oil, which after baking them for a while in the oven produces a very crispy flake-like consistency. The other nuts you may choose to use play the role of honeyed granola clusters. Combine it all with your favorite dried fruit and there you have it - your own perfectly customized cereal. You might not even go back to the boxed grain cereal variety after trying this.

I will list the ingredients I used. Feel free to follow this recipe word for word the first time. Next time, try  adding chopped or ground macadamia nuts to the slivered almonds and walnuts. Or, change out the dried cranberries for dried cherries or raisins. Pour in your imagination with each new batch.

Taste in Bloom Original Photo
Difficulty: Easy; Serves: 6; Prep time: 15 minutes + 1 hour baking time

Adapted from Paleo Parents
Ingredients:

  • 1 1/2 cup sliced or slivered almonds
  • 1 cup chopped or ground walnuts
  • 1 cup dried cranberries
  • 1/2 cup dates, diced 
  • 1/2 cup coconut oil, melted
  • 1/3 cup honey
  • 1/2 Tbsp ground cinnamon

Preparation: 

Preheat oven to 275 degrees. Line a cookie sheet with parchment paper.

Combine nuts in medium mixing bowl.

In a separate small bowl, whisk together melted coconut oil, honey and cinnamon. Pour over the nuts and mix together well.

Spread the nut mixture evenly on the parchment paper lined cookie sheet.

Bake for 45 minutes, stirring every 15 minutes. Check consistency before turning off the oven. If you wish for the nuts to be slightly browned, bake an additional 5-10 minutes. Much longer gives them a slightly burnt flavor. 

Remove cookie sheet from the oven and allow the nut mixture to cool. Transfer to a mixing bowl and stir in the dried fruit. (Note: I do not include the dry fruit with the nut mixture in the baking process because they will harden like rocks. Mixing them with the nuts after the mixture has cooled keeps them chewy).

Store in an airtight container for up to several months.